Pages

Showing posts with label crafts. Show all posts

Monday, December 19, 2011

Last Minute Handmade Gifts

Here are five handmade gifts that can be made last minute. I am still mostly making mine so you'll just have to trust me that I have tried these and they are great. Also, all no sew.

Healthy Frozen Dinners! - I made my mother and father in law five dinners, they were all hearty, healthy, and a little involved. If they were too easy they wouldn't have made a great gift! The point is to gift meals that are saving your recipient a night of work and kitchen clean up. I included directions, coffee, wine, frozen rolls and bread (made fresh at our market with organic ingredients). I tried to buy nice items and use high quality ingredients. It started out seeming a little overwhelming but what I ended up doing was just having a huge cooking day and I doubled almost everything I made them and froze it for us as well which meant I also had a week of no cooking for myself after my crazy, intense day! ... guess what though I don't have any photos ;)  


Name, Birthday or Anniversary Photo Collages - My photos for this project are sitting at Walgreen's right now, that's one of Ava's A's above. Go to this Flickr site (try not to spend hours looking at the galleries) and pick a name or a birth year or anniversary year and download the numbers or letters you like. Next upload them to your favorite one hour photo place and have them printed at 4x6. When you go to pick them up stop by TJ Maxx or Walmart etc. and pick up a good frame with the right amount of openings. It is easier to make dates if you do this last minute because 4 opening photo frames are easy to find! You can make your own of course (like this) by gluing cheap dollar store frames to a board and spray painting it all - but remember you have less than a week now so maybe next year. If you buy a mat that is pre-cut and print them in black and white then they will look a lot more like the classic ones you see everywhere. The one below could also be pretty cool - it looks like it is just those cheap packs of Ikea frames glued to a black board cut to size. 

 Jewelry - there are some awesome jewelry tutorials online. I want this bracelet and it has a video! I would wear this everyday. Making jewelry is easy and can be done in front of the TV in one night. 


We did make bracelets but we went a little lower-end than the one above ;) Ava made these for all her cousins and a few friends too with a bag of beads from the craft store. Everyone loved them. I really wanted to help Ava made bracelets with all their phone numbers on them but the number beads for those turned out to be too hard to find enough of for everyone. Most kids need ten numbers on their bracelet now since almost all of them memorize cellphone numbers. 


Chalk Board - These are great for kids and adults. I made this one for our entry with a dollar thrift store frame spray painted gloss red. I had my husband cut me a cheap piece of wood scrap which I painted with chalk paint to put in the frame (we tacked it in on the back). I made my own chalkboard paint with this tutorial. Apply chalk board paint on with lots of thin layers and then 'season' it well as directed in the tutorial link. If you aren't making several boards or aren't using the chalk paint for other projects then you would be better off just buying the chalk paint pre-mixed, because the DIY version leaves you with a ton of extra ingredients.


I plan to mix up some more paint to make Ava a board book like this one.

Penny Keychain - I am still looking for my last few but simply putting pennies from each important year on a keychain is such a sweet gift! The ones sold by PatsDesign (photo below)  are also affordable and come with a stamped coin. It is pretty simple to drill through a penny but practice on a few first. 


Other things I have made as gifts in the past include superhero capes (for girls and boys) and embellished tea towels. I also really want to make some enhanced silhouettes like these.

There you go! Happy Crazy Crafting!

Monday, March 14, 2011

etsy and summertime

I have had summertime on the brain! From browsing my Etsy favorites apparently I want a $300 Etsy gift card so I can buy some summer:


Print from - The Wheatfield 


Photo Print from - honeytree


Skirt From - KimHerring


Print From - Hannah Skoonberg


Fabric From - rainydaysandfundays


Patter from - Snazziedrawers


Pattern from - pinkpoodlebows


And my favorite (because Ava loves to sing this song and so did my Great Grandpa) 
another print from - The Wheatfield

Tuesday, February 22, 2011

New Cricut Banner for the Girl's Room - seriously cute!

I have a new love for my Cricut because of the 'Once Upon a Princess' Cartridge (which I purchased for $16 on eBay). It  cuts hundreds of things including dolls, desserts, lots of clothes for the dolls and pop-up castles. I have done several really cute things with it and here is the first to share! This is hanging in the girl's new room which I will post photos of asap because it is really darling and has the sweetest feeling I think. Ava and I had worked on this together (she stuck the pieces on and then I fixed them) so she really thinks it is neat.


 L - R : Cowgirl (Ava's fav), Princess, Girl Cooking
L - R: Mermaid, Fairy, Swimsuit / Birthday / Umbrella Girl (my fav)

Cricut Tips for the 'Once Upon a Princess Cartridge' - Use double sided paper so you can cut multiple expressions without changing paper. Don't get hung up on using all the pieces to each layer just mix and match - for example on the girl's here I only used the mouths that cut once the other's just have left over pieces. My girl's are 5 inches any smaller than that and I don't think that they would have worked. When making the dolls you can put a small piece of any color paper behind their eyes to make them the color you want because there isn't an option for cutting them out otherwise.

For some reason some of my most popular posts revolve around these non-traditional Cricut ideas and you can find more Cricut Ideas at this link.

Which dress-up girl is your fav ?

Tuesday, November 16, 2010

Getting Ready for Thanksgiving

Getting Ready for Thanksgiving & A Few Thanksgiving Activities for Toddlers & Preschoolers

We are really excited about Thanksgiving this year. We will have lots of family in town, including my niece who is also two and it will be of course Lilly's first Thanksgiving. I doubt we will do as much cooking in advance as we did last year but I am sure with all the extra help we will work it out.


I was thinking about getting Ava prepared to understand the holiday and realized I knew very little about it other than football and dinner. These videos from History.com helped me a lot.

I still remember lots of Indian and Pilgrim crafts around the holiday and while I know that it wasn't all love and turkey between the Indians and Pilgrims I have decided that it is still worth learning about - even though sometime in middle school my girls will have all their Pilgrim / Indian love dreams shattered by a history teacher.

So... I ordered this Little People Thanksgiving play set from fisherprice.com -

(Is there anything more 80's holiday throw back than Pilgrim and Indian plastic people? I think not. Just embrace it - I know you want to.)

We have some fall decor out as well as scarecrow dolls, a plush turkey and a bunch of library books about Thanksgiving in a basket to play with and talk about the holiday. I do this holiday basket idea at Christmas as well, it seems to be interesting to my toddler and keeps the seasonal stuff tidy during the holidays. We also have the Santa and Nativity Little People sets. 

We will make some turkey hand prints, maybe on fabric and put them in a embroidery hoop to hang. Oh yes, look at how I found a craft my 3 week old can make ;)


We will make a Thankful Book by drawing the people we are thankful for and coloring them. Ava, at two, can pretty much understand this concept, especially if you use phrases like "thank you for my grandma" instead of "I am thankful for Grandma."


- Some fun ideas  - 

(Fun that the blogger's mom gives her children a bucket each year)


 (I would be so cool if I made these for Ava's class)

(Too bad we don't actually have 'fall' here but if we did!)


(I hope my niece and daughter will get to make this)

Otherwise we just cook lots of great food, enjoy some wine and map out our black Friday shopping trip! 

Wednesday, October 20, 2010

waiting...39.5 weeks!

Just a little update here ... just waiting ... due on Monday. No sign of anything impending. Still going into work making everyone a little nervous ;) Had an amazing experience today getting a prenatal massage. Everyone should have one a few days before their due date. It was a really cool experience how responsive Lilly was and how connected I felt to her. I have small babies and easy pregnancies and therefore don't really think that often about having a child inside me. So it was new to have this very spiritual experience today ... made me think maybe I can hold out a little longer. O.K. well maybe not really ;)

photo - Over this past weekend hanging out downtown. I know I wish I had those Naartjie boots too!

 p.s. please don't put your $1 store ice mold in the microwave to melt your pumpkin crayons...it isn't going to end well... 
 

Tuesday, June 22, 2010

A New Skirt I made and some easy, quick, free sewing patterns

First, I really wanted to find some patterns to make that were easy and quick! The first one I found was this skirt from Oliver + S. I couldn't use the selvedge for the interior seams since I was making it for a 22 month old and that would have been huge so i used the selvedge for the bottom hem instead and cut the piece based on where I wanted it to fall on Ava. You only need 1/4 yard or even less for a toddler skirt.

My first try - which is sometimes a wash - turned out pretty good. It is a little big, but cute because Ava doesn't have any long skirts - her shirt is pretty big too actually. I could totally rig up one of these for myself - oh, oh or a tiny matching one for Lilly!


Here are a few other patterns I think look very, very easy - 

Popover Sundress from Oliver + S

32 minute messanger bag from Amy Smart via a guest post on Design Mom

Fabric Flowers from the Idea Room

Adding a Ruffle to a Hoodie from the Idea Room

Ruffle Butt Onesie from Ucreate

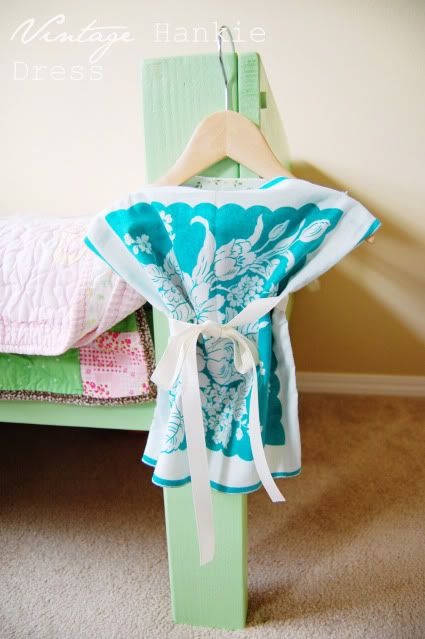
Vintage Baby Hankie Dress or baby shirt from Trey and Lucy (omgosh so adorable, so easy!)


Tuesday, June 15, 2010

Vintage Flag Pennant - for Birthdays, Closets, Playrooms, etc.

So I finished it - Ava's closet curtains are lined and her pennant is up! (Before pictures here)

I used inspiration from this Etsy listing and a few other pennants I had seen online and cut up two sizes of triangles - the larger from a nice fabric print and the smaller from a piece of vintage fabric of some kind. Then I used a pair of pinking shears to trim the edges of each triangle. After that I just simply stitched the smaller triangle to the larger one and then layed them all out where I wanted them on a long piece of ribbon and stitched them on. 


The project took about 2 hours and the most complicated part was working out how to get the right number of smaller triangles out of my vintage scraps. I would like to brag that I didn't buy one single thing for the project - just used scraps I had - this is a really awesome project for using up those tiny pieces of wonderful fabric that you just can't let go of!


I may add another dimension to the top of the pink ribbon (like a sheer piece of vintage lace) and on two of the pennants I used pretty heavy top fabric so I may have to put some stabilizer on the back of those - so far not too much curling though and I like the 'shabby' look with the ruffled textured curtains. 

Oh and here is Ava because she was sure once she realized I was taking photos that she should run in and smile ... because really what else do I take photos of but her??? ;)

Wednesday, June 2, 2010

Developing Your Own Toddler Curriculum: Art - Painting


When thinking about toddler art curriculum I like to think of it in the following categories (again to make sure I am providing a broad range of experiences):

Painting * Drawing * Sculpture * Printing (overlaps a lot with painting) * Textile Arts * Collage * Photography * Crafts * Digital Art

I think painting is the most fun so here is the list of every toddler painting activity I could think of and find. Beyond experimenting with different kinds of paint (finger, watercolor, tempera, glitter, biocolor, powder, fabric, etc.) and brushes here are some other fun activities you can do with toddlers:

Fingerpaint with pudding, yogurt or cool whip - color with food coloring or do this in the shower.

Shaving Cream Painting - color with kool-aid or tempera paint. Make design and then press paper on top of it. There are lots of cool marbled effects you can get with shaving cream and paint.

Kool-aid Paint - Mix 2 tablespoons of water with one packet of kool-aid and paint. When dry is scratch and sniff!

Texture Paste - Equal parts flour and salt, mixed with a little water and tempera paint to make a thin or thicker paste

Painting & Printing with a variety of objects:   feathers, combs, q-tips, potato masher, toothbrush, bath poofs, etc. Anything with fun textures.

Stamp & Sponge Painting

Crayon Relief - Color a picture with crayons and then paint over it with watered down tempera paint. Works beautifully for under the sea drawings painted over with blue watered down paint. Also you can use white crayons to create a design and then paint over it

Make stamp pads by watering down tempera paint on a wet sponge

Ball Painting: drop dabs of paint on  a paper in a box or lid and then roll marbles or balls through it to create a design

Bubble Painting:  Add food coloring to bubble mix and blow bubbles onto paper. For older children you can use paint in the bubbles.

String Painting: Tie things to string and drag or just drag string

Bingo Markers or bingo marker containers from school supply store to fill with washable paint

Spin Art - Put paper in an old salad spinner and drop in different colors of paint - then spin. Very messy.

Frozen Paint - Mix tempera paint and water then freeze in ice cube trays, paper cups, or popscicle trays. You can also freeze BioColor

Food Prints - cut up hard different fruits and veggies to make stamps. Apples and corn are the most common.

Spray Bottle Paint - Watered down paint in spray bottles. Fun to put a shape down on the paper and spray over then remove the shape, layer colors etc.

Snow Painting - Use spray bottles filled with water and food coloring to paint snow.

Dropper Painting - Use droppers filled with paint or watered down paint

Rain - Put freshly painted paper in the rain for a few seconds

Coffee Filter Painting - Use bingo stampers, spray bottle painting, or dropper painting. Once dry cut out shapes. Makes a tie-dye effect. This is how you make the wing portion of the popular clothes-pin butterfly.

Magnetic Marble Painting - Bin or box propped up on the sides. Paper in the bottom of box with paint splattered around then put magnetic marbles on top of the paper. Use a magnetic wand underneath the box the move the marbles around and paint. You can buy the wands for about $1 and 20 marbles for about $6 through Discount School Supply.

Car Painting - Use toy cars and trucks to create tracks on the paper.

Animal Tracks - Use toy animals to make foot prints on the paper

Nature Painting - Using shells, leaves, sticks, etc. as stamps

Painting Life Size Objects - Trace your childs body, draw a life-size version on their favorite car or bike, etc. on a big roll of paper and have them paint the huge shape.

Body Prints - Besides just printing with hands use feet, elbows, wrists, belly, cheek, etc.

Sidewalk Paint - Make your own! http://www.petitelefant.com/homemade-sidewalk-paint/

SOURCE NOTE: The ideas I didn't add from memory were mostly pulled from answers to a forum thread on Baby Center.com that I just can't get back to for some reason.

More toddler curriculum ideas here or under the category 'toddler curriculum'

Can you think of any more???

Wednesday, March 3, 2010

Applique shirts - look I actually craft sometimes!


These three shirts are for a friend's family - who is probably reading this ;)

Applique is sort of my main sewing endeavor (besides the one dress I made for Ava), I am super self taught and so my zigzag stitches (the Ava shirt) skip, it all takes me a long time, and even though I plan on adding buttons, ribbons, etc. I usually am 'done' with the shirt by the time I get done with the cutting, tracing, ironing & sewing. Make these in lots, they are pretty satisfying - can be done in about 30 mins each or even less for the tie which is super easy and a good place to start. These photos are huge so if you click them they will pop up full size and you can see the detail.


Some Good Links: 
How to Applique - http://sewmamasew.com/blog2/?p=518
Applique Zig Zag Stitch Problems - http://www.craftster.org/forum/index.php?topic=330969.0
Using a machine to make more of a satin stitch with really close zig zags - http://www.girlythingsbows.com/applique_shirt.html

My personal tip - if you can't get your zig zag to work or you are having problems you need to use iron on, tear away backing.

p.s. Michelle you should totally add some funky buttons and bows to these - wait do you decorate boy's clothes with buttons like that - maybe not.

Friday, February 26, 2010

Embroidery Hoop Mobile Roundup

I love these embroidery hoop mobiles, think: weddings, parties, kids rooms, nurseries, over a table, anywhere really! Almost all of these have tutorials for how to make one but actually it is pretty intuitive I think. You can also purchase them or something similar hand-made from Etsy, many sellers will work with you to match your theme exactly if you aren't up to DIY. This is a perfect Cricut project though!


Embroidery Hoop Mobiles for a Party. Just some big simple circles in your colors or something to match your theme - shapes, letters, numbers, characters, etc. 

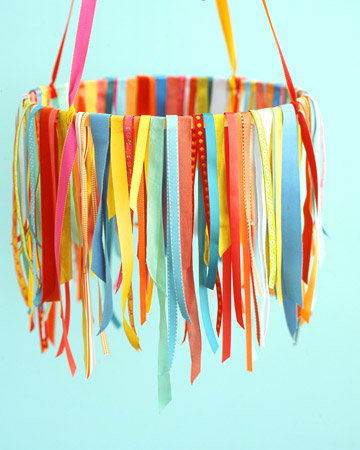
Ribbon Mobiles also made from Embroidery Hoops. 


Not sure about the flowers used in this one, but it does show how to use an inner ring. 


Like the last one, this bird mobile is maybe not totally my style, but it does show you how to use the hoops in creative ways. 


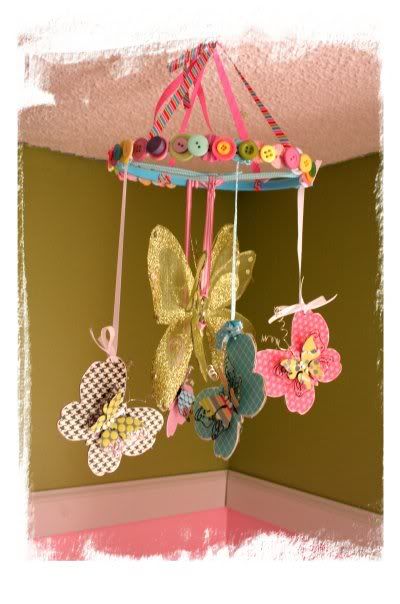
I love the buttons on this butterfly mobile


Sweet little hearts! Cool string. Oh what if some of these were translucent!


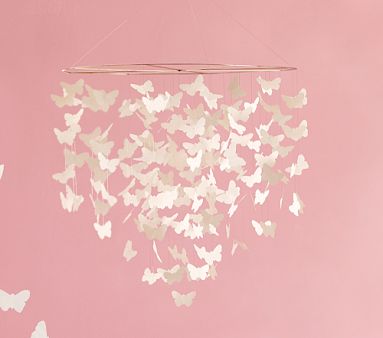
So sweet, used to be sold by PBK but good for inspiration. 


You can buy this one that is similar to the one above for a wedding from Etsy for $38 - pretty good price really. I love how the ribbon is tied shabby all around the hoop. 

Do you have any cool mobiles in your home?

Wednesday, February 3, 2010

Valentine Cards - free printable downloads and recycled crayons.

So tell me why would I cut my own cards out with my brand new fancy cutting machine when I could make more crayon shapes? I love crayon 'recycling' - even though it isn't really recycling for me because Ava is too little to have tons of broken crayons. I made some huge stars and summer shapes for her birthday gift bags last summer. Tonight I made these for Ava's class and they took no time at all. The cards are free to print out from thelongthread.com.


How to Recycle Crayons - Just break up and peel some bright crayons, put a layer or two in a mini shape pan that can go in the oven, push the light colored ones to the bottom, bake at about 300 till just melted, pull out carefully so you don't over-mix the colors, allow them to cool to being stiff, then pop the pan in the freezer, when cold you can just dump them out. 

Other (very cool so definitely click them) Options for Free Printable Valentines:

The 2010 Secret Agent Josephine's Printable Cards HERE (I love this blog)
30! printable Valentines from TheLongThread - http://thelongthread.com/?p=5698
Some repeats from the link above but other ones too over at Alphamom.com HERE

Planning any fun Valentines?

***Update 2/5***
More Free Valentines in this post, including some for adults! - http://nestbliss.blogspot.com/2010/02/totally-unrelated-things-but-worth.html

Tuesday, February 2, 2010

Craft, Sewing, and other ideas for BOYS

Since this is a little confusing I am just going to copy (below the line) exactly what these ladies said on their blog. Basically two bloggers are spending the whole month posting tons of boy crafts and other boy stuff - VERY COOL ideas. You need to go to both blogs to see all the projects. Just read below for all the details, it started Monday so there is already tons of stuff to look at!


Like the tutorial for this awesome shirt - 


----------from www.dana-made-it.com-------

For THE ENTIRE MONTH OF FEBRUARYMade is teaming up with Made by Rae (the two Made-Maids) and together we're going to:


To "moms of boys" out there, we've heard your woes! There just isn't enough info shared amongst us about BOYS. There aren't enough clothing ideas, enough tutorials, enough fresh ideas. Well ladies (and little gents), we're going to stock your Tonka Trucks full of info!

Throughout the month you'll find:
* TONS of Boy tutorials
* Boy clothing ideas
TWELVE guest bloggers! (this part REALLY excites me)
* Boy crafts
* Boy bags
* Baby Boy stuff
* Boy giveaways
* Boy design tips

Boy, that's a lot! And remember....it's happening on TWO blogs!
Not a lick of girly glitter here for the whole month. It's gonna be hard. But I think we can do it.

These buttons will take you to both blogs.

Related Posts with Thumbnails